Use a Visual Studio Subscription for Copilot Studio Pay-As-You-Go Billing
If you are building with Copilot Studio beyond the included M365 Copilot license entitlements, you eventually need a pay-as-you-go billing plan for additional usage specially for Github Copilot Harness which requires credits even for development.
One practical option is to use the Azure credits that come with a Visual Studio subscription, provided your subscription benefit is active and the offer supports the required resources. This is useful when you want to experiment with Copilot Studio.
Why this helps
Copilot Studio licensing and agent usage are not the same thing.
- A Microsoft 365 or Copilot license can give you authoring access or bundled entitlements.
- Extra usage still needs capacity through a billing plan when you go beyond those included limits.
- If you already receive monthly Azure credits through a Visual Studio subscription, you can often use that subscription as the backing Azure subscription for the billing plan.
What you need before you start
- A Copilot Studio environment where you want to enable billing
- A Visual Studio subscription with Azure credits activated
- Permission to create or manage billing plans in Power Platform
- Owner or sufficient access on the Azure subscription you want to attach
If your Visual Studio subscription was activated in a different Microsoft Entra tenant, enable the subscription to the tenant used by your Copilot Studio environment first. Laura Kokkarinen documented that tenant transfer flow clearly here:
The key idea is simple:
- Activate the Azure benefit attached to your Visual Studio subscription.
- Make that Azure subscription available in the same tenant as your Copilot Studio environment.
- Ensure your admin account has rights on that subscription.
Please note it was an issue to add Azure Subscription to a dev tenant, this seems to have been resolved now.
Create the billing plan
Thanks to Lee Ford who showed me how to create a billing plan attached to the VS Studio Azure Subscription. Once the Azure subscription is visible in the correct tenant, create the billing plan from Copilot Studio or the related Power Platform billing experience.
1. Start a new billing plan
Choose to create a new billing plan for the environment.

2. Select the Azure subscription
When prompted for the Azure subscription, choose the one backed by your Visual Studio credits.
If the subscription does not appear:
- confirm you are in the correct tenant
- confirm the Visual Studio benefit was already activated
- confirm your account has the required Azure role assignment

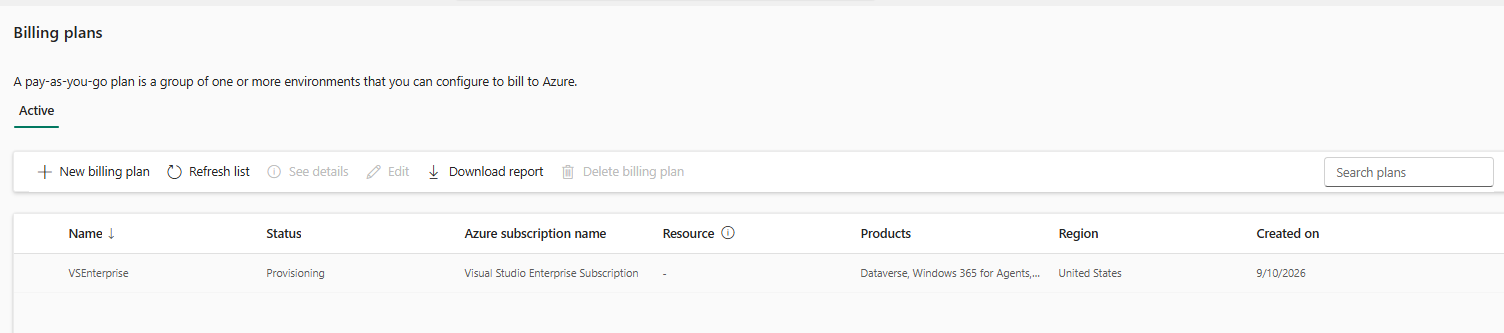
3. Wait for provisioning
After you submit the request, the billing plan enters provisioning.
4. Confirm it is enabled
When provisioning finishes, the billing plan should show as enabled for the environment.

Final note
This setup is a good way to use existing Visual Studio Azure credits for Copilot Studio experimentation and small-scale testing. For long-running production workloads, you should still validate subscription limits, supported offers, and expected Copilot Studio consumption against your organization’s billing model.